
Built to Float: Durable PermaFloat® Piers That Move With the Water
Why we specify PermaFloat® for floating piers
PermaFloat® foam-filled floats combine a rugged rotationally-molded polyethylene shell with fused EPS foam for long-term buoyancy and compressive strength. Their factory-installed mounting features and multiple sizes make them ideal for boxed joist framing and reliable dock performance.
The floats: material & specs you should highlight
- Rotationally molded polyethylene shell with UV inhibitors.
- Fused EPS foam core for structural buoyancy and durability.
- Factory mounting flange and pre-molded mounting slots.
- Select sizes that exceed design load + safety factor.
Our Design Process: CAD & Precision Planning
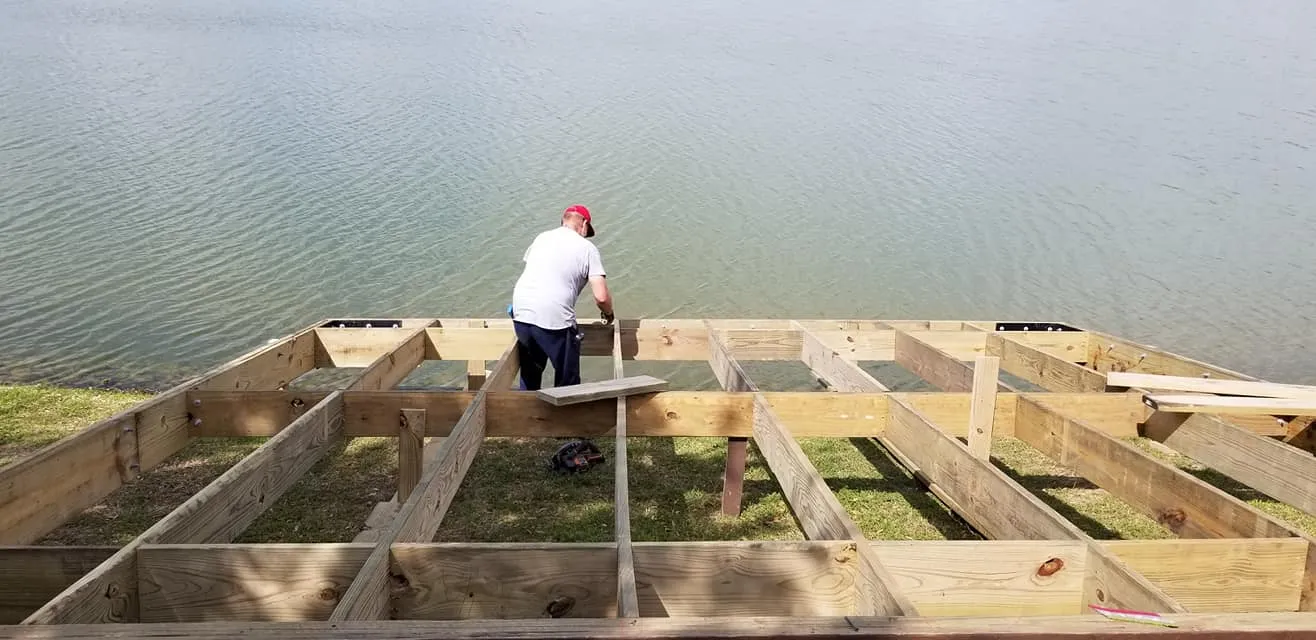
Before any materials are cut, every floating dock we build begins as a detailed digital model. Using computer-aided design (CAD) software, we meticulously map out the entire framing structure. This allows us to plan the precise placement of each PermaFloat® flotation device to ensure optimal buoyancy and stability. Every piece of bracing is strategically positioned within the CAD model to guarantee structural integrity and longevity, ensuring the final product is not only durable but perfectly balanced.

Joist frame construction — “boxing” the PermaFloat modules
We build a strong joist frame forming bays sized for your specific PermaFloat® models. This ensures the dock sits level, transfers load correctly, and keeps each float centered inside its bay.
- Layout & spacing: Joist spacing matches float bays exactly.
- Lumber selection: PT 2x8 or 2x10, or aluminum/engineered lumber.
- Construct the box: Rim joists + cross joists create rigid float bays.
- Float runners: HDPE/timber runners prevent abrasion.
- Install access: Removable deck sections for float insertion.
Installing the floats inside the joist bays
Once the bays are framed, we slide each PermaFloat® module into place, align the mounting slots, and secure them using stainless or hot-dipped galvanized hardware.
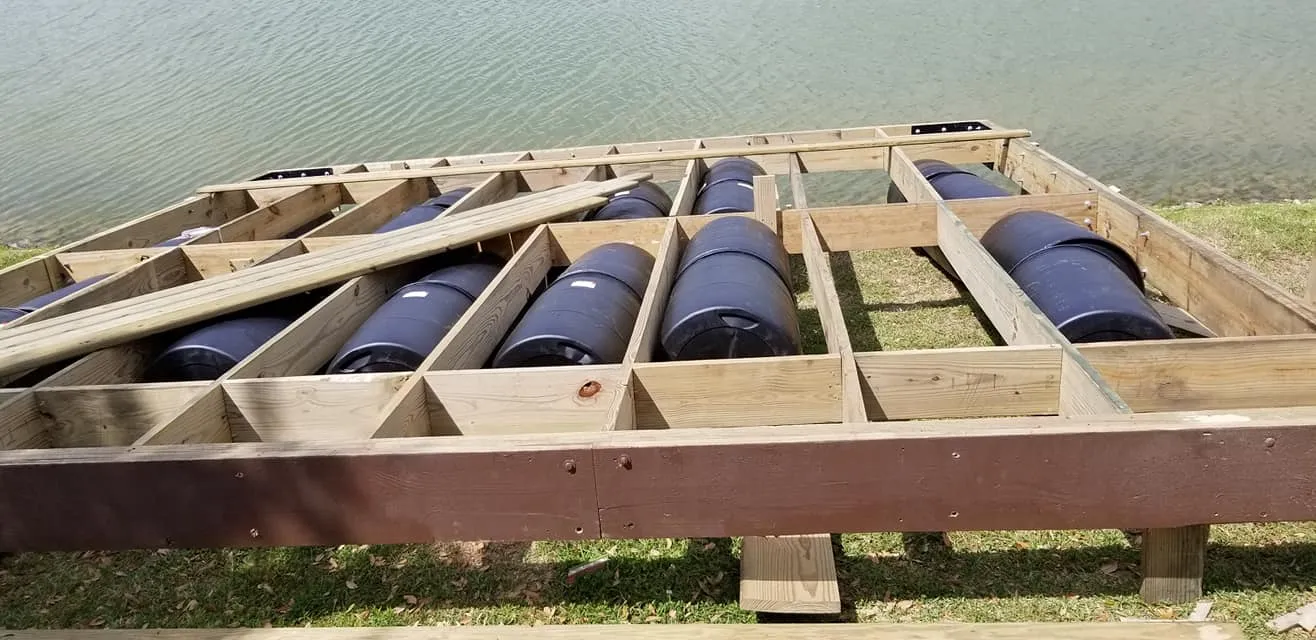
- Mounting flanges aligned correctly to joist backing plates.
- Use stainless or galvanized bolts + backing plates.
- Protect edges with HDPE or angle trim.
The hinge mechanism — allowing movement with water level changes
After floats are secured, we install a heavy-duty hinge system at the shore connection or between dock sections. This hinge allows the entire dock structure to pivot smoothly as the water level rises or falls, preventing frame stress.
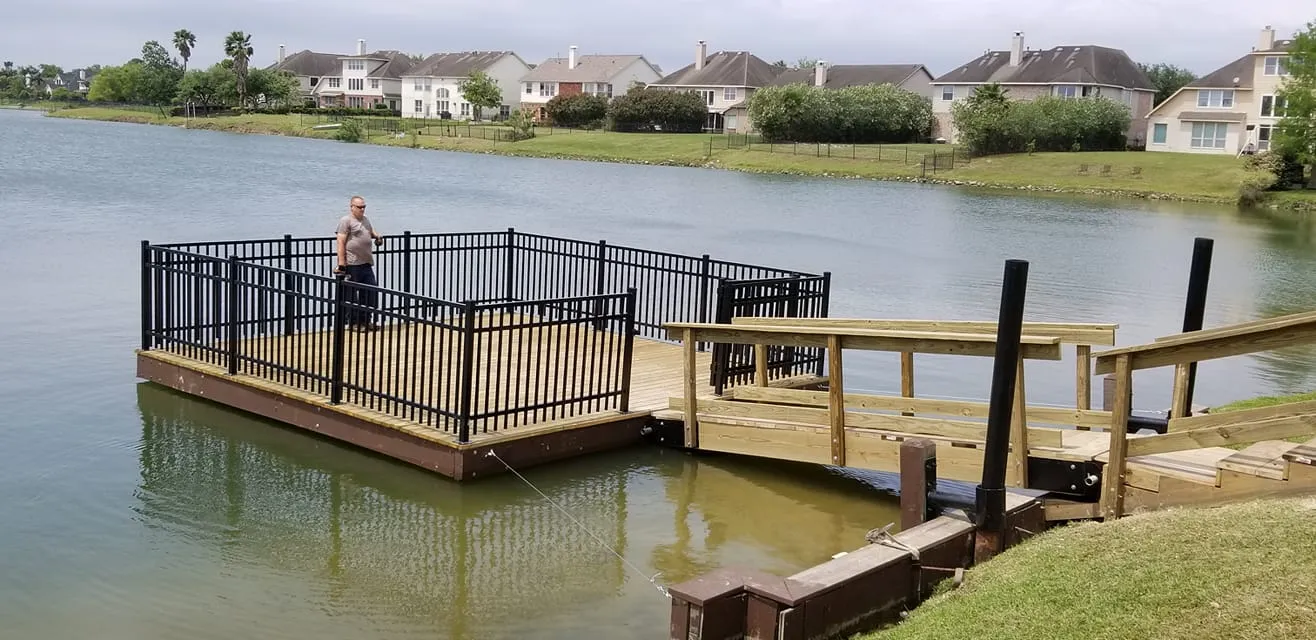
Final installation checklist
- Total buoyancy exceeds calculated load with safety margin.
- Float hardware tightened, secured, and corrosion-rated.
- Hinge movement tested across full water range.
- Decking installed with removable float-inspection panels.
Sources & References
Note: We are not sponsored by or affiliated with PermaFloat®. We simply trust their products for our projects.